
How to Connect a Chiller to Your HydroBarrel 240 | 350 & 480
A step-by-step guide for correct circulation and easy cleaning
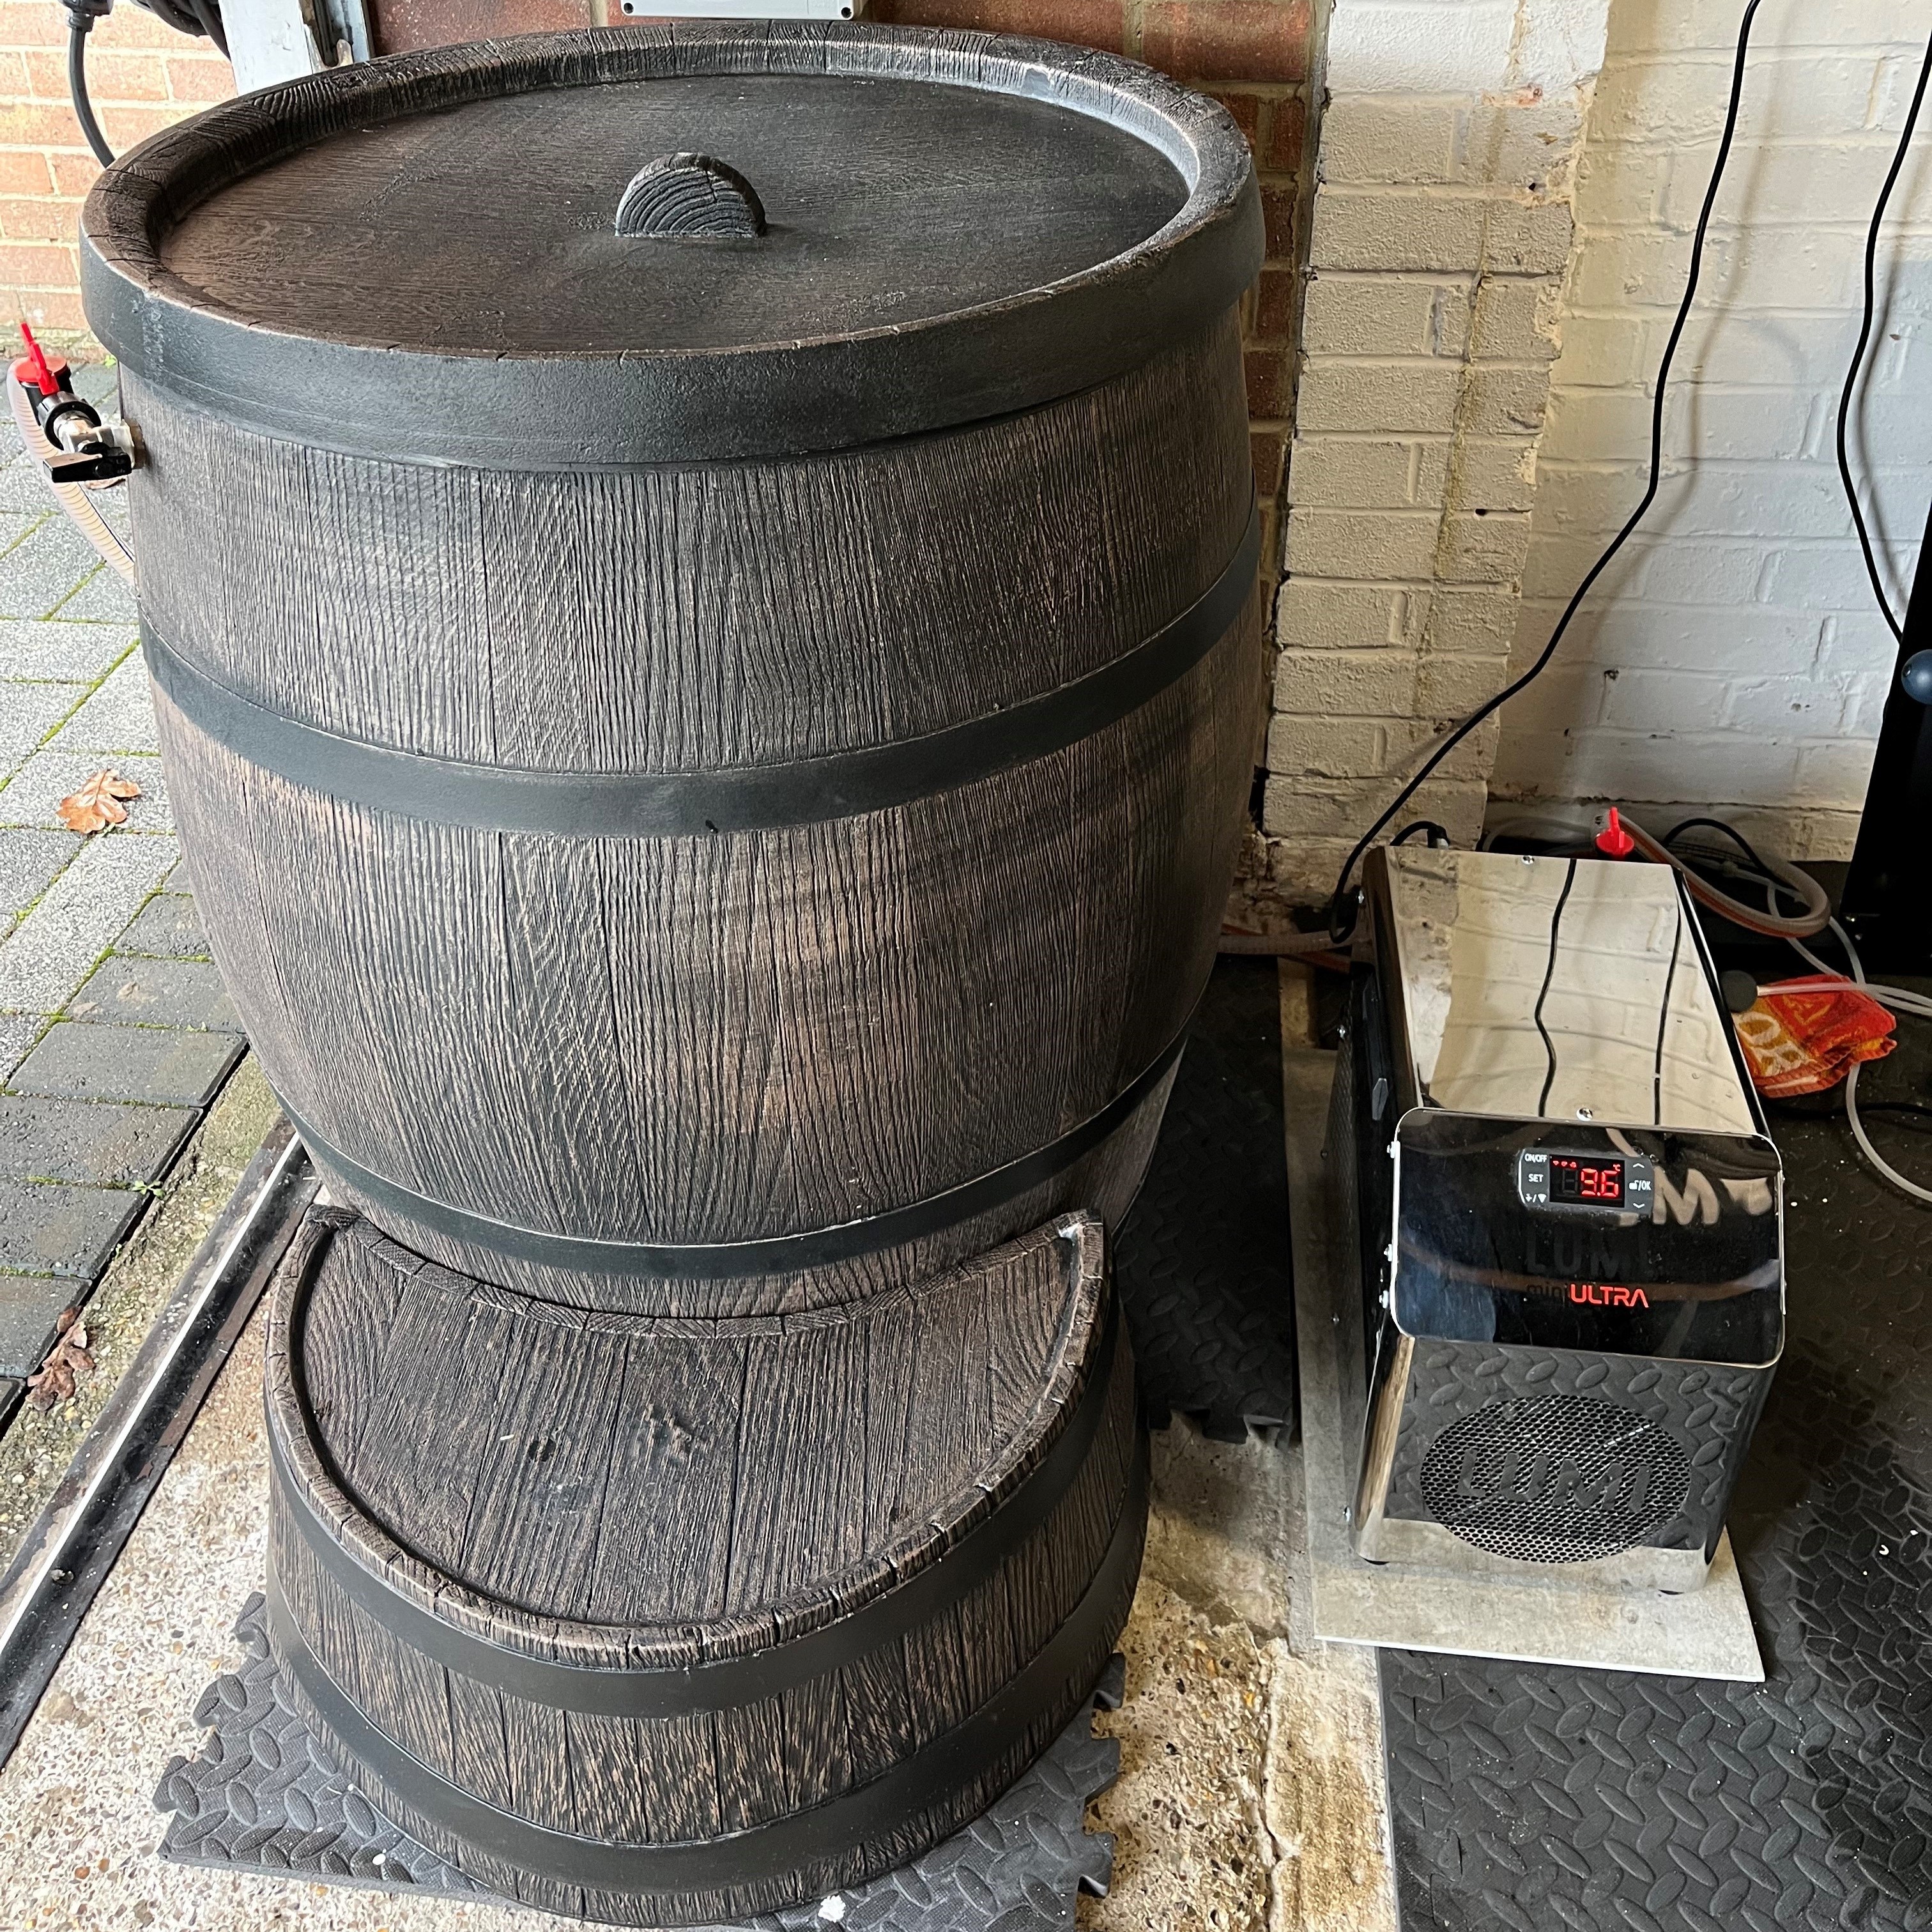
Connecting your chiller correctly to your HydroBarrel is essential for achieving efficient cold plunge cooling, proper water circulation, and easy drainage. Whether you’re using a MyoChill, LumiMini, or a premium heat pump chiller, this guide shows you exactly how to install it for reliable bottom-to-top water flow.
Why Bottom-to-Top Circulation Matters: Circulating water from the lowest point ensures colder water is evenly distributed and prevents temperature layering inside the barrel. This improves cooling efficiency, reduces strain on your chiller pump, and maintains a more consistent plunge temperature.
If you would like to know more information on the HydroBarrel vist our blog: Benifits of the HydroBarrel Ice Bath
Before You Start: What You’ll Need
HydroBarrel 240 | HydroBarrel 350 & HydroBarrel 480
Before fitting your chiller, check:
-
The type of chiller you are using (hose size and connection type)
-
Whether you want quick-release fittings or a fixed connection
Quick Release setup:
-
Top hole → water return
-
Middle hole → blanked off
-
Lowest hole → water feed & drainage
Fixed setup:
-
Top hole → water return
-
Middle hole → water feed
-
Lowest hole → drainage
Option 1: How to Connect a Chiller Using Quick-Release Hose Fittings
Best for: Easy disconnection and frequent cleaning
What you’ll need:
-
Chiller (Example: we used a MyoChill)
-
2 × quick-release taps - one is provided with the HydroBarrel and you can add another here HydroBarrel Tap - Quick Release
-
1 × Inlet / Outlet plug (for unused hole) Fitted by us as standard.
Step-by-step:
-
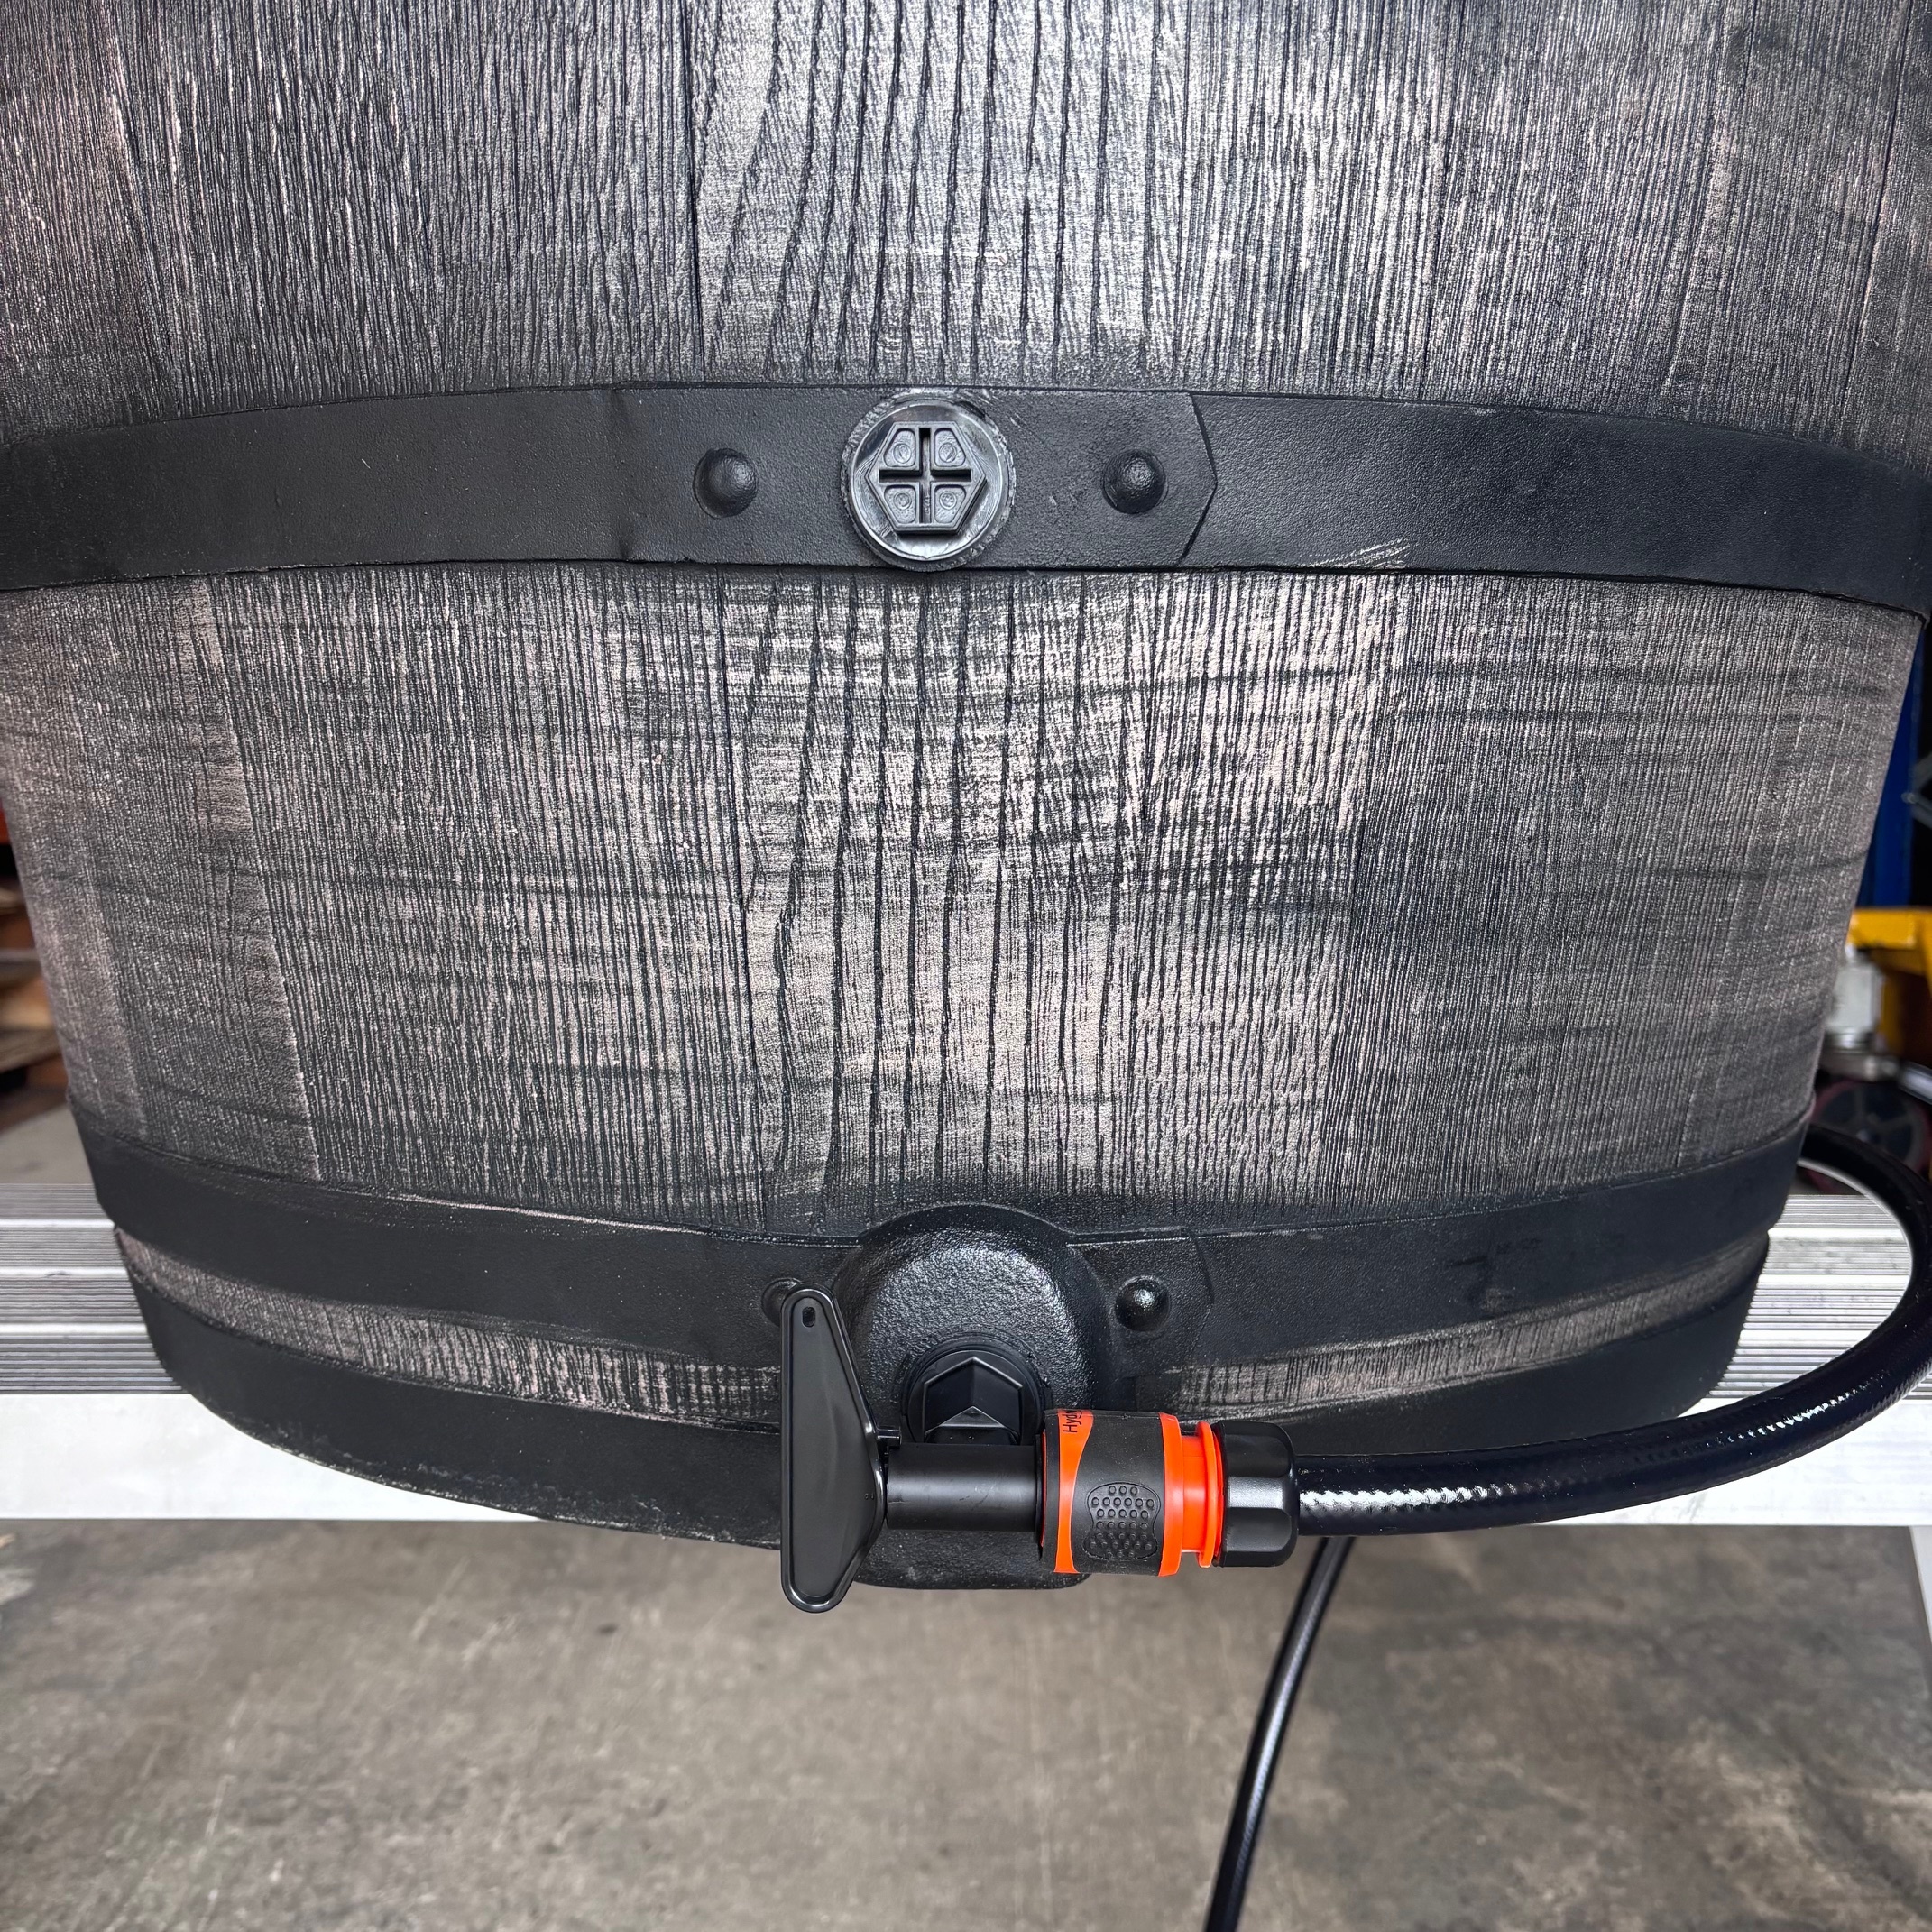
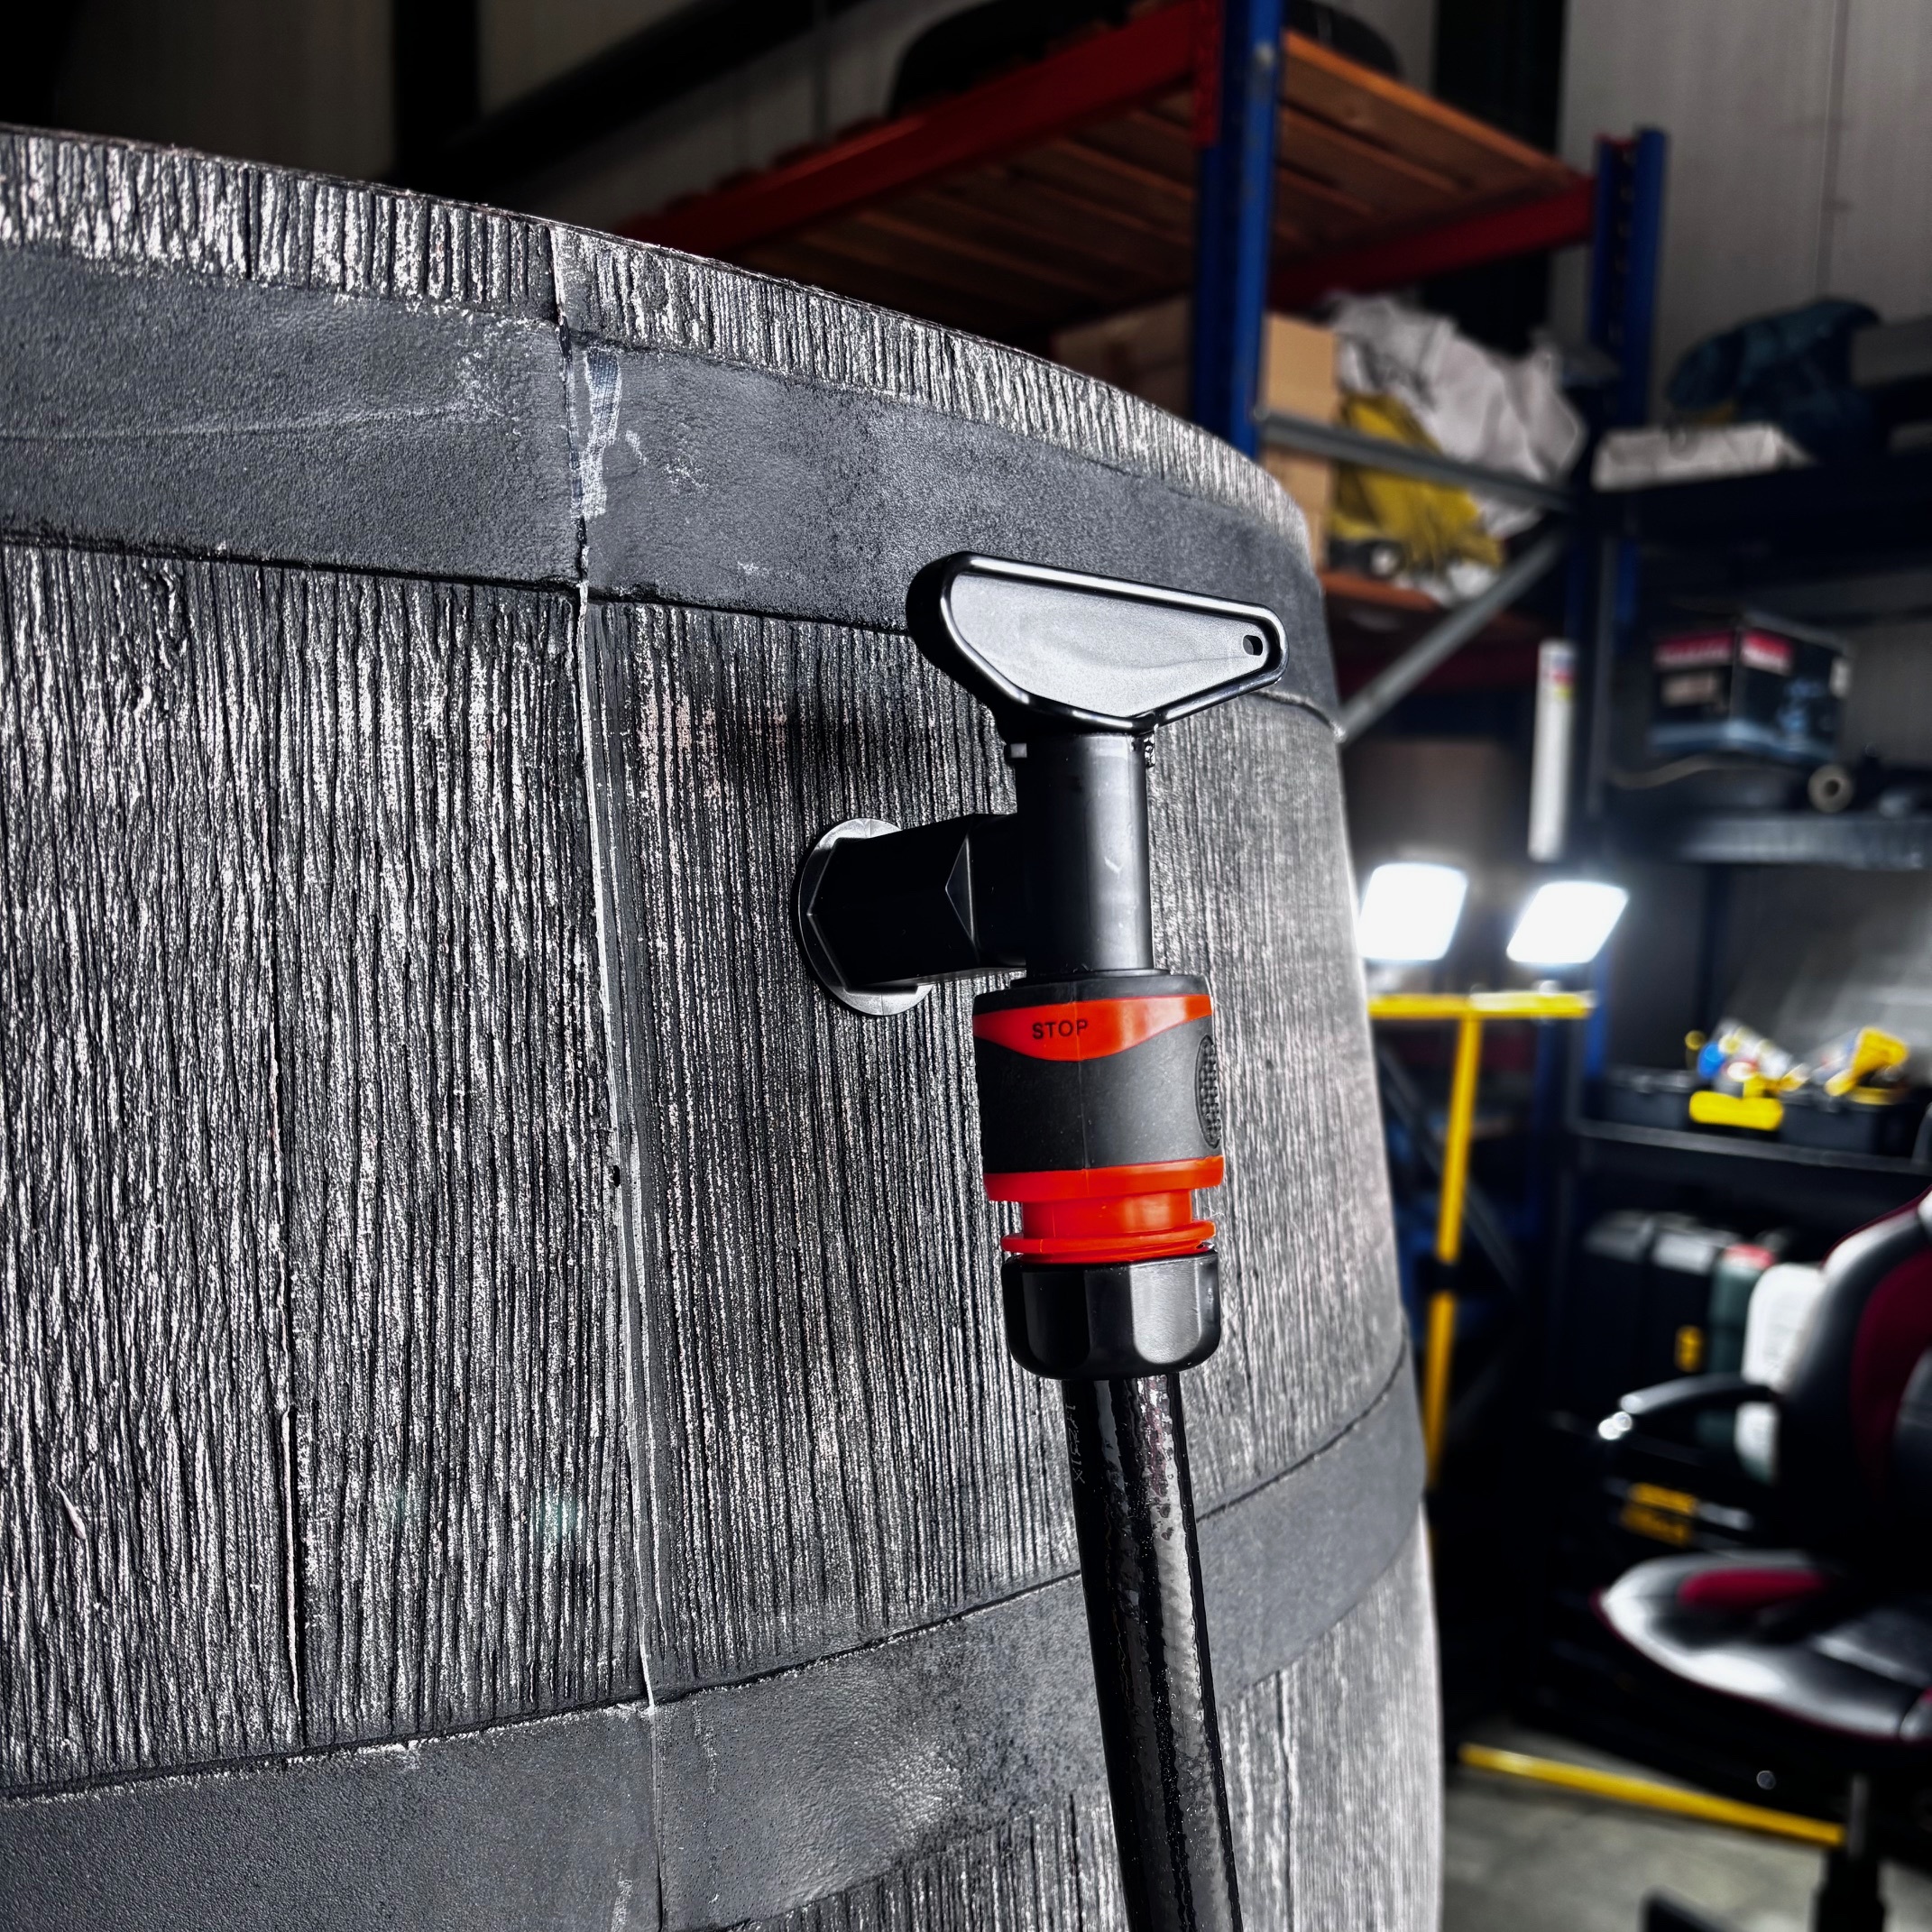
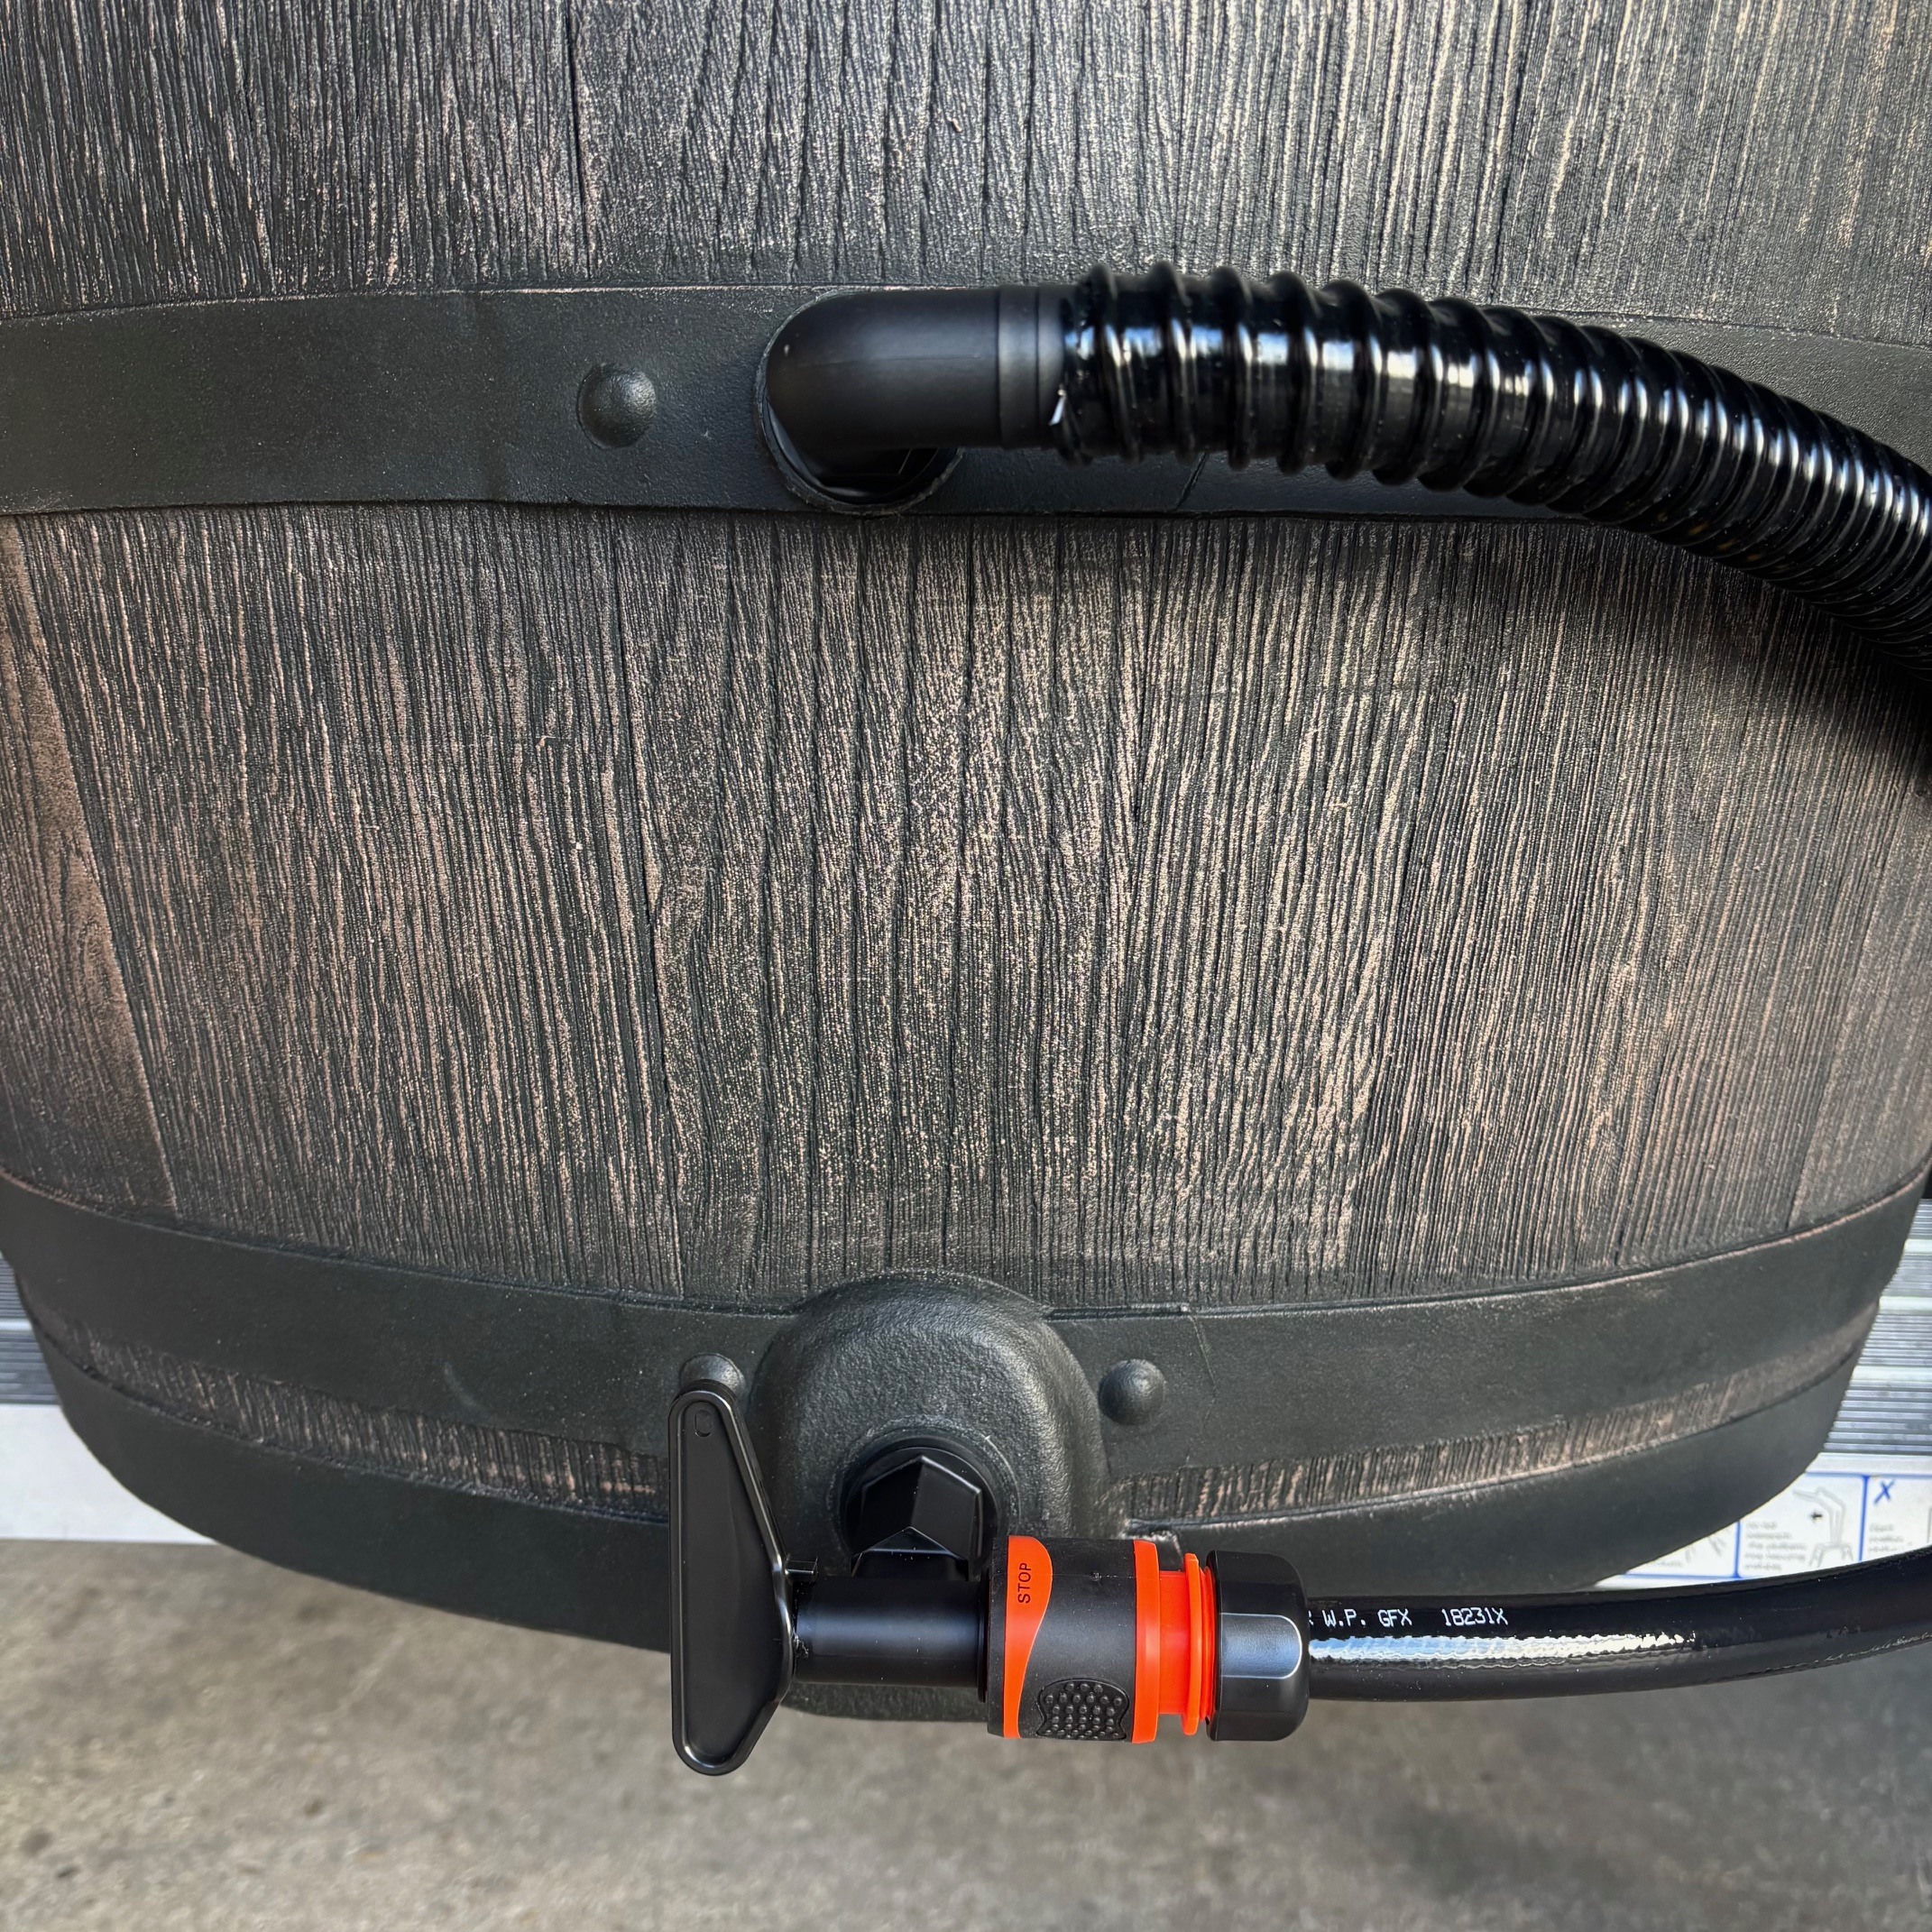
Fit the first quick-release tap into the lowest hole of the HydroBarrel. The tap sits to the side for easy connection, see photo below.
-
Fit the second quick-release tap into the top hole and secure it from inside the HydroBarrel using the supplied washer and nut.
-
Seal the middle hole with a plug (supplied and fitted by us).
-
Connect the chiller hoses using the quick-release fittings.
Result:
-
Water circulates from bottom to top
-
Chiller can be disconnected quickly
-
HydroBarrel is easy to empty and clean
Option 2: How to Connect a Chiller Using Fixed Hose Fittings
Best for: Permanent installations with minimal hose removal
What you’ll need:
-
Chiller (Example: we used a LumiMini Chiller)
-
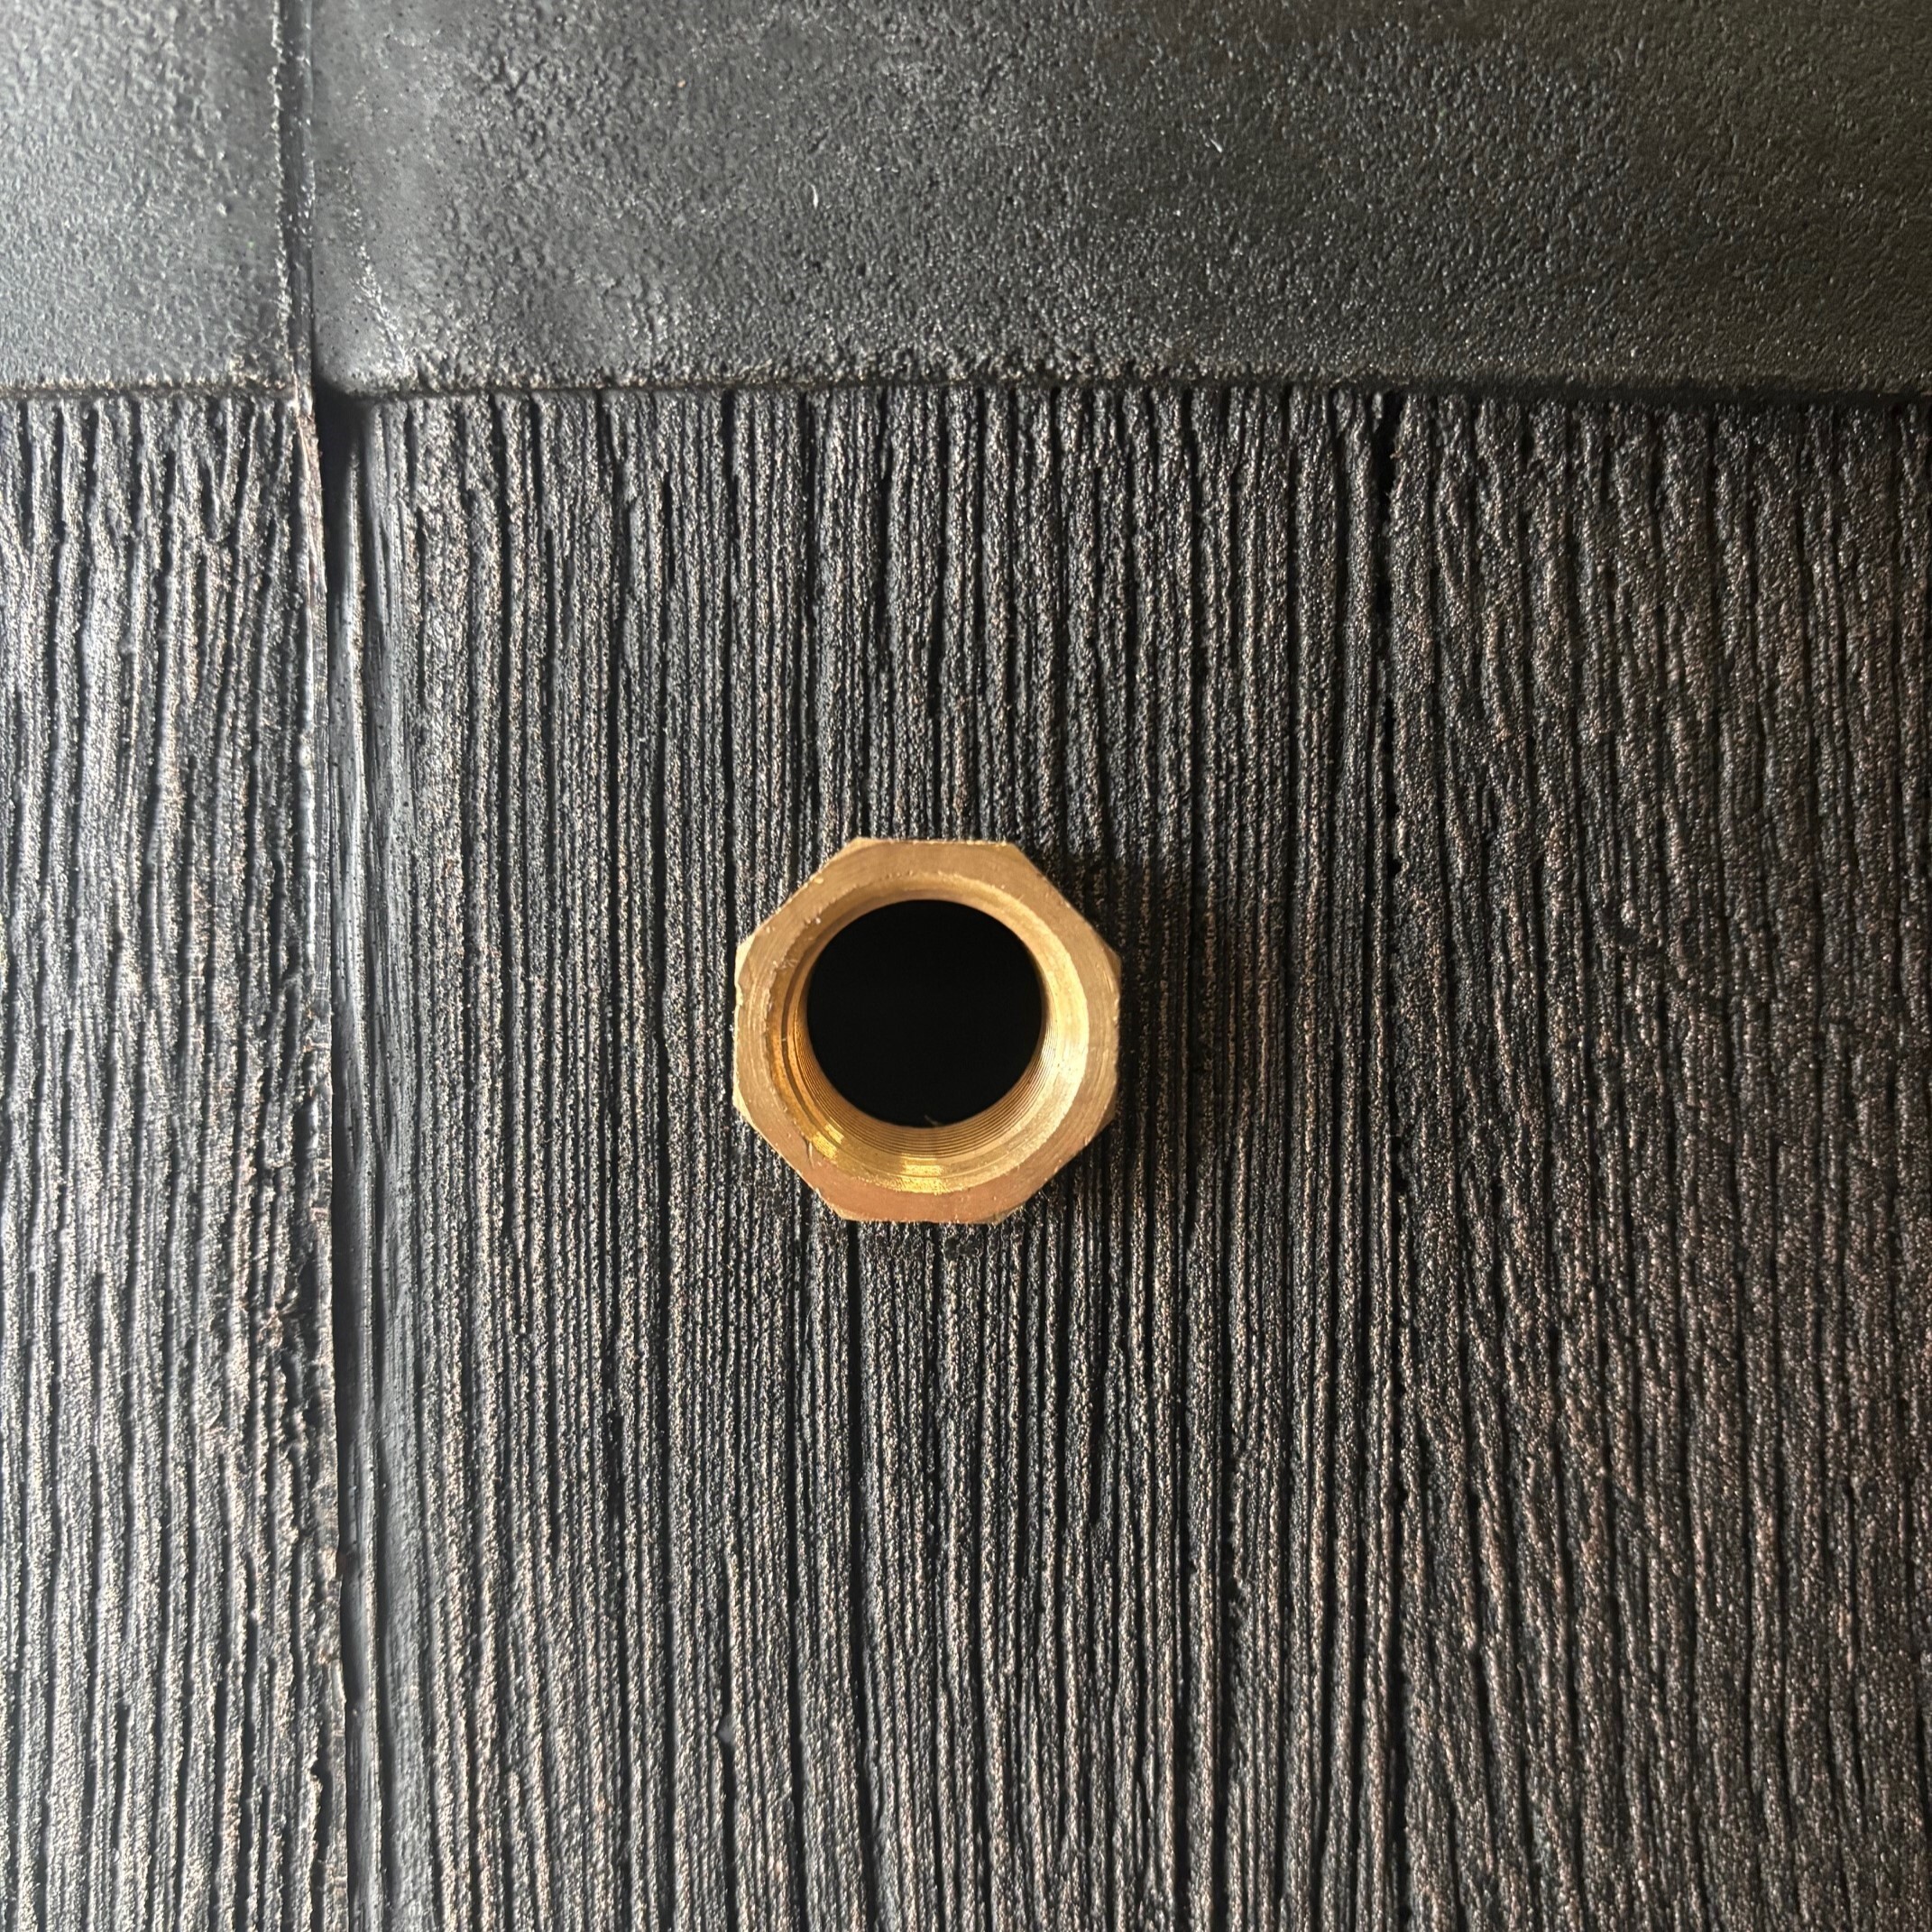
2 × Fixed reducers ¾” BSP (25mm) to ½” BSP (21mm) You can add the reducers here and we'll fit them before shipping your HydroBarrel
-
1 × Tap with quick-release hose fitting (Provided with the HydroBarrel)
Step-by-step:
-
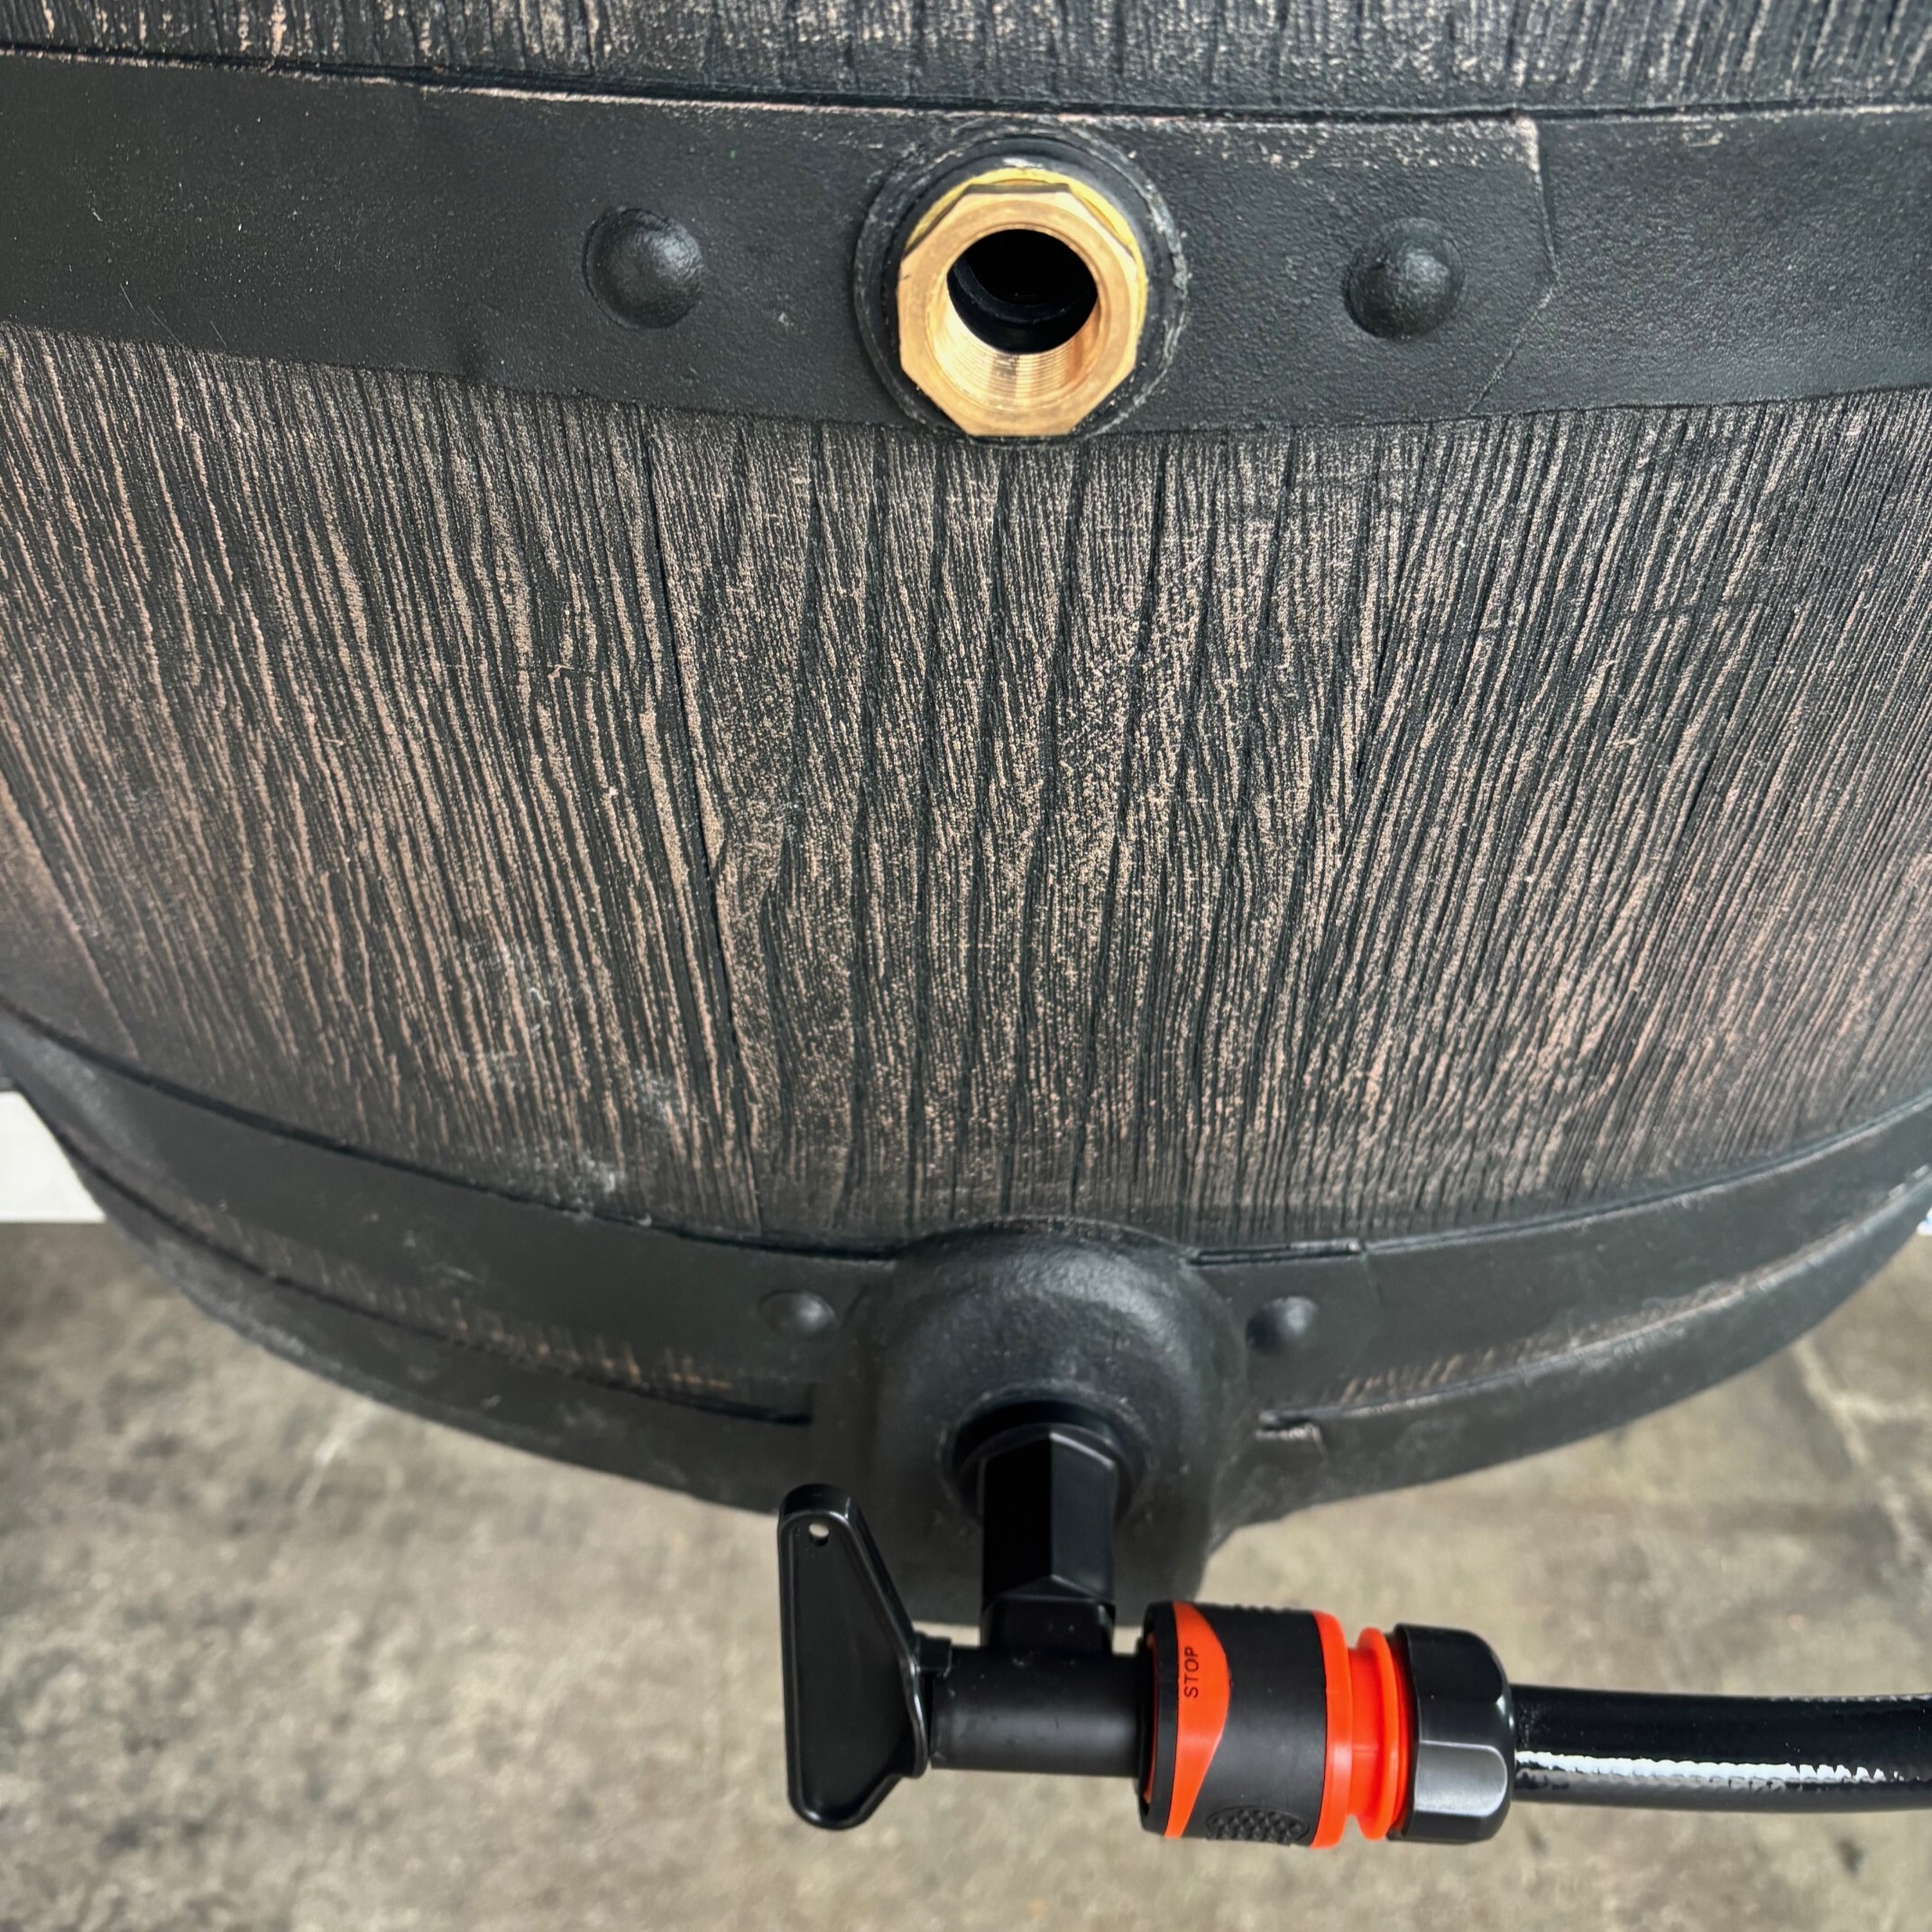
Fit the first reducer into the middle hole of the barrel (We'll do this for you).
-
Fit the second reducer into the top hole (We'll do this for you).
-
Fit a tap with a quick-release fitting into the lowest hole.
-
Screw in the chiller fittings to the reducers and use PTFE tape for a watertight connection (PTFE Tape provided with the HydroBarrel)
Result:
-
Fixed bottom-to-top circulation
-
Stable, permanent hose connection
-
Simple draining via the bottom tap
Option 3: How to Connect a Chiller with a Fixed 25mm Internal Hose Fitting
Best for: Premium or heat-pump chillers requiring larger hoses
What you’ll need:
-
Heat pump or premium chiller
-
2 × 25mm hosetails which are in this 25mm Connection Set
-
1 × Tap with quick-release hose fitting (Provided with the HydroBarrel)
Step-by-step:
-
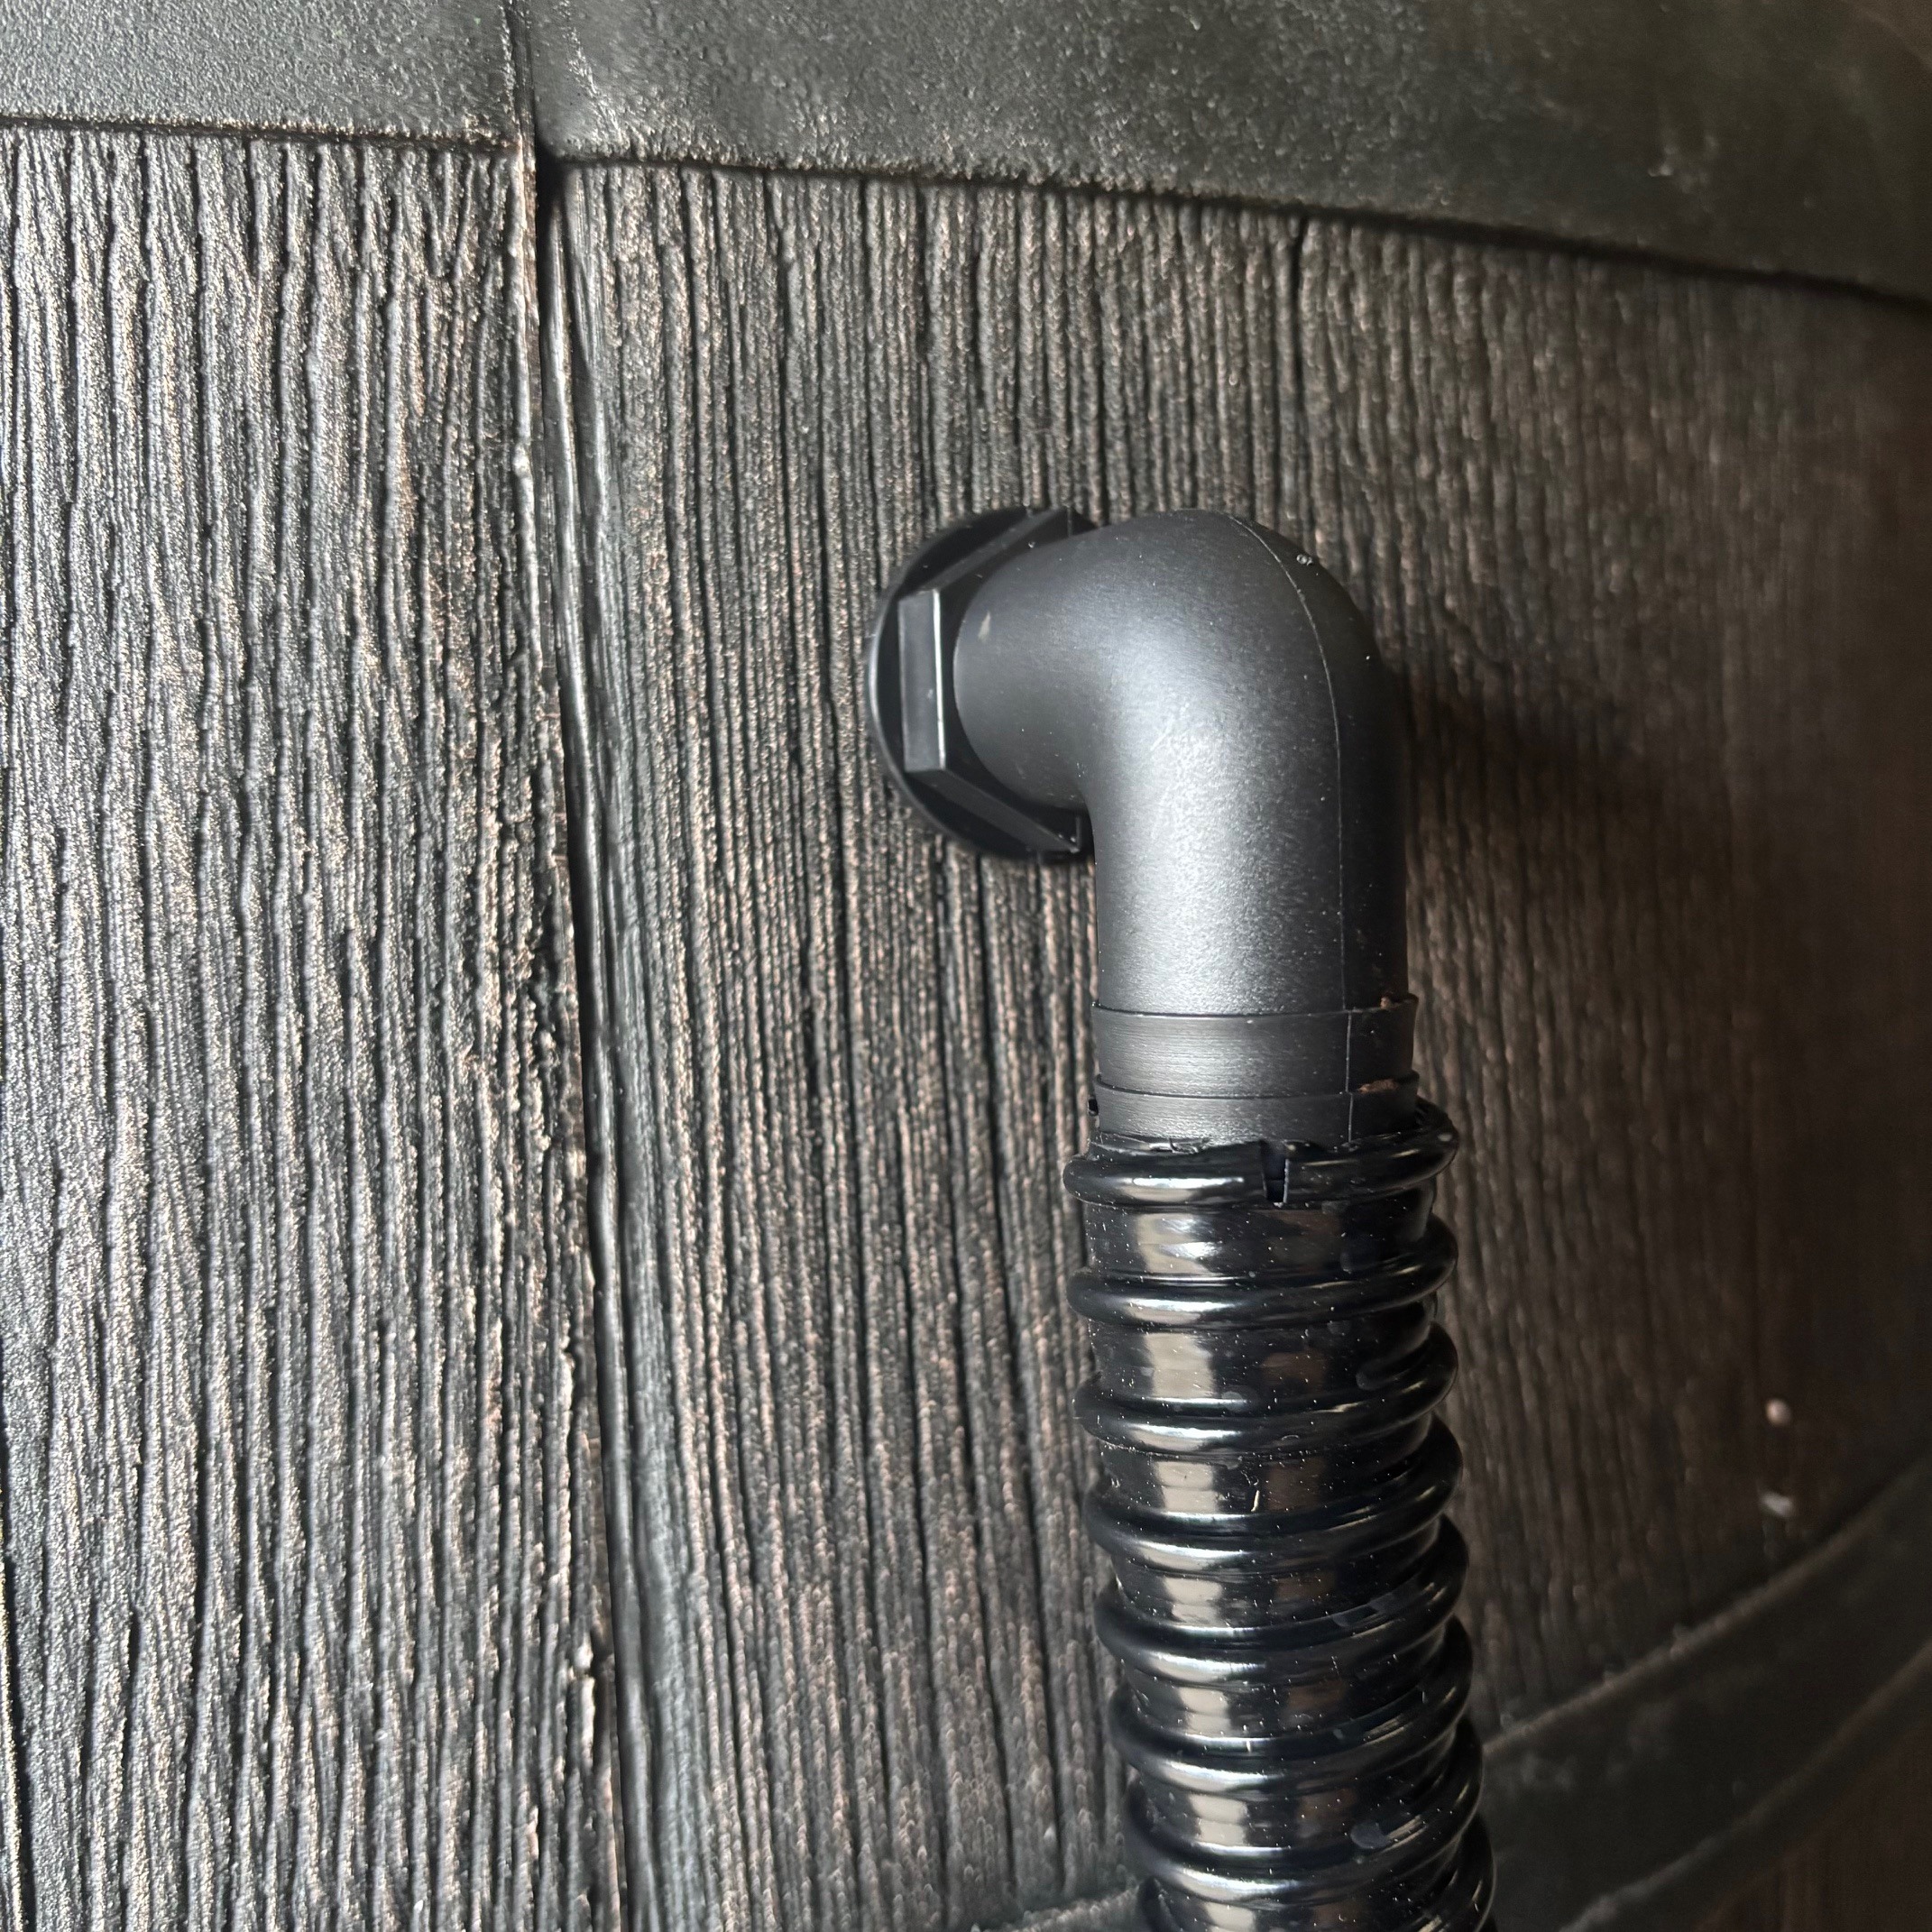
Fit the right-angle elbow into the middle hole.
-
Fit the second right-angle elbow into the top hole with the nut and washer provided. The washer and nut are placed inside of the HydroBarrel to secure the right-angle elbow.
-
Fit a tap with quick-release fitting into the lowest hole.
-
Connect the 25mm internal chiller hoses securely to the fittings.
Result:
-
Strong, fixed bottom-to-top circulation
-
Designed for higher flow rates
-
Easy emptying through the bottom tap
Final Tips for Best Performance
- Aim for bottom-to-top circulation to ensure even water cooling throughout the HydroBarrel.
- Double-check all fittings are secure and leak-free before switching on the chiller.
- Label your hoses if you plan to disconnect them regularly to make reconnection quick and mistake-free.
If you have any further questions about the HydroBarrel, we’ve created a helpful guide: “FAQ’s – HydroBarrel Ice Bath.”
You’re also welcome to Contact Us — we’ll be happy to help.